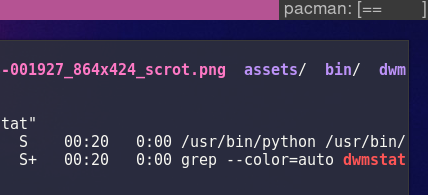
A dwm status bar in python customized for my version of dwm with different colors. This status bar update
with signals for better volume integration and also displays a loading bar when your package manager is
running
Usage: dwmstat
Sets the status bar of dwm to a small and precise status bar
Arguments:
-h, --help The help message
-v, --verbose Display on the terminal the output of the command
-t, --time Set the refresh timein seconds (default: 60)
Status output:
[Date Time][Battery][Local IP addresses][Volume][Distribution hostname]
Made by p4p1.
Loading bar
The loading bar is toggled when a package manager is running, currently it does not show progress
properly and just endlessly cicles but I am looking into changing that soon.
Install
To install this status bar you can use pip the python package by downloading the
repository and running:
$ sudo pip3 install -U .
After installation you can add the script to your startup app, if you need the full
path you can use whereis
Dependancies
The dependancies for python should be automatically installed by pip.
Cause this project is also the tentative staff I try to write something in Rust, it would not include too many features.
Basic Content System without categories
Multiple administrators supported
Administractor management panel
Article management panel
Draw supported
Customized template
RSS supported
Template
Project rubble highly depends on tera, a fast and effective template engine in Rust, which means that you can write your own template with tera syntax.
There are files in template folder as follow, which are the template for each page:
admin folder
panel.html dashboard of admin panel
login.html admin login page
homepage.html index of whole site
archives.html template of single article page
Obviously you can learn how to write this template by the guide of official template folder, and how to use tera syntax in tera’s official website.
How to use it
After deploying rubble to your host, the first thing you need to do is login to the admin panel with url http://yourdomain.com/admin. And the default admin user and password is as follow:
Username: admin
Password: password
after logging in, please modify the default password of admin. Then you can enjoy the whole project system.
Deploy using Docker
you can easily use Docker to create your own rubble application. And the latest version of it and each tagged version would be built as docker images storing in Docker Hub automatically. So you can easily pull those images by using docker pull kilerd/rubble:latest
Rubble uses PostgresQL as data storage, so before strating rubble application, you need to start your postgres service and link it to rubble.
Rubble image can accept some environment variable for setting up:
DATABASE_URL url of postgresQL
Docker Stack
But we recommend to deploy rubble with Docker Swarm or Kubenetes. here is a simple file to create a whole rubble application with postgresQLdocker-compose.yml :
The following guide assumes that you’re by now using Pulsar, a community-driven fork of the Atom editor. Should you still be using Atom, use apm command instead of ppm.
Package Manager
Install language-nsis from the editor’s Package Manager or the command-line equivalent:
$ ppm install language-nsis
Using Git
Change to your Atom packages directory:
Windows
# Powershell
$ cd $Env:USERPROFILE\.pulsar\packages
Inside the cloned directory, install its dependencies:
$ ppm ci
Build the source:
$ ppm run build
Package Dependencies
This package automatically installs third-party packages it depends on. You can prevent this by disabling the Manage Dependencies option in the package settings.
Usage
Completion
With most commands, you can specify available options before completion. For instance, rather than completing RequestExecutionLevel and then specifying an option, you can directly choose RequestExecutionLevel user from the completion menu.
However, you have to type __LINE__ to complete to ${__LINE__}.
There are several special cases for your convenience:
MB_OK completes to MessageBox MB_OK "messagebox_text"
onInit completes to a Function .onInit block
LogicLib completes to !include "LogicLib.nsh"
Drunken NSIS
Fuzzy syntax completions are available through the “Drunken NSIS” snippets, which iron out some of the inconsistencies of the NSIS language, for instance word order.
Example:
FileRead equals ReadFile
ReadINIStr equals INIStrRead
SectionSetText equals SetSectionText
LogSet equals SetLog
FindFirst equals FirstFind
${FindLine} equals ${LineFind}
Building
There are many ways to compile NSIS scripts in Atom. But before you read on, make sure makensis is in your PATH environment variable.
This package contains a build system to compile your NSIS scripts. To trigger a build, select “NSIS: Save & Compile” from the command-palette or use the keyboard shortcut.
If you prefer working with custom compiler arguments, you can specify them in the package settings. Optionally, you can also specify the path to makensis.
Third-party Build Tools
Should you prefer working with an existing third-party build system, the following packages already have support for NSIS.
Project files for build-makensis can be created by executing “NSIS: Create .atom-build file” from the command-palette or using the keyboard shortcut. You can specify your preferred build file syntax (JSON/YAML) in the package settings.
You can set up atom-runner by executing “NSIS: Set default runner” from the command-palette or packages menu. To remove it, use “NSIS: Remove default runner”.
Linting
This package will install an Atom linter provider for makensis. By default, NSIS documents get linted when opened or saved. Make sure to refer to the linter-makensis documentation to learn about available lint modes and other settings.
Other Commands
There are several other, previously unmentioned commands available from the command-palette:
Command
Description
NSIS: Command Reference
Look up NSIS command online
NSIS: Open Package Settings
Opens settings page
NSIS: Show Version Info
Shows current version of NSIS
NSIS: Show Compiler Flags
Shows output of makensis /HDRINFO
NSIS: Convert Language File
Converts NLF to JSON and vice versa
Environment Variables
This extension supports a variety of ways to provide environment variables such as NSISDIR or NSISCONFDIR. The following precedence applies:
.env files
system-wide environment variables
Note: Some operating systems require the editor to be launched from terminal in order to access system-wide environment variables.
Additionally, you can pass special environment variables prefixed with NSIS_APP_ as definitions to your installer script.
This is the official github repository for the NavCoin Stake Box. This repository is the source code behind the raspberry pi image which runs the navcoin daemon and a PHP based web wallet.
Current Version: v1.0.8
You can download the raspberry pi image from our website:
Below are some basic security configurations which you might want to implement when setting up your NavPi. The NavPi will work immediately if you simply burn the img to the SD card, plug it into your network and turn it on.
Flashing the image to your SD Card
If you purchased your NavPi from our store, you can skip straight to the setup section since we have already flashed the NavPi image onto the device for you.
OSX
Format the SD card choosing FAT (MSDOS) format and GUID Partition Map Schema.
Because we ship the image with some default settings, we do recommend taking the following precautions.
Setup
SSH is disabled for security purposes, so any configuration you want to do must be done directly on the device.
Plug in Screen, Keyboard & Mouse.
Power on Raspberry Pi.
Enable WiFi
It is recommended to use Ethernet as WiFi can be very slow to sync, but if you must use WiFi you can set it up via the graphical user interface on the device.
Boot to the Raspberry Pi GUI Operating System.
Right click on the network icon in the top right task bar.
Add your WiFi configuration.
Lock Down NavPi Web Access to local IP Addresses
The NavPi is already locked down to ip address ranges:
192.168.x.x
172.16.x.x
10.10.x.x
This should prevent anyone accessing the Web UI from outside of your local network. If your local network is on a different IP range to these defaults or you want to lock web access down to a particular IP address, then do the following:
Boot to the Raspberry Pi GUI Operating System.
Open Terminal.
In terminal type sudo leafpad /etc/apache2/sites-available/navpi.conf and press enter.
Find the <VirtualHost *:443> section.
Add, Remove or Modify the lines Require ip XXX.XXX to be the IP address or range you want to allow.
Save and close the file.
In terminal type sudo service apache2 reload and press enter.
Change the Default Unix Password
Boot to the Raspberry Pi GUI Operating System.
Open Terminal.
In terminal type passwd and press enter.
Enter navpi101 as the current password.
Enter your new password.
Confirm your new password.
Write down your new password.
Create a new SSL certificate
The NavPi ships with a default ssl cetificate installed, but you will want to generate a new one when you set it up.
When you’re prompted, fill in each of the details with your own or just press the enter key as these details are not required for a privately used ssl key.
Once you’ve generated the ssl key we need to flush and reload apache:
sudo systemctl daemon-reload
sudo service apache2 reload
Whenever you browse to your NavPi’s ip address, it will force HTTPS using this new certificate.
Since it’s a self signed certificate, your browser will still complain that it is insecure, but all communication to the NavPi through your browser will be encrypted so no one can intercept your passwords.
Find the IP Address of your NavPi
Boot to the Raspberry Pi GUI Operating System.
Open Terminal.
In terminal type ifconfig and press enter.
Find your inet addr (eg. 192.168.1.99).
Using the computer on your network which you’ve granted IP access to, open your web browser (Firefox, Chrome, Internet Explorer, Safari).
In the address bar of your internet browser type in the inet address discovered by ifconfig on the raspberry pi.
Log into the NavPi Web Interface using the default password nav.
Change the Default Web Interface Password
Log into the Web Interface of the NavPi.
Click on the Control menu item
In the Server section, click the Change UI Password button.
Type in your new password.
Confirm your new password.
Write down your new password.
Encrypt Your wallet
Log into the Web Interface of the NavPi.
Click on the Control menu item.
In the Security section, type your desired password into the text field next to the Encrypt Wallet button.
Press enter, or click the Encrypt Wallet button.
Write down your new password.
Unlock for staking
Whenever you reboot your device, you need to make sure it is unlocked for staking to earn your rewards.
Log into the Web Interface of the NavPi.
On the home page click the button that says Your Wallet Is Locked, Click To Change.
Enter your password into the box next to where it says Unlock for Staking Only.
Press enter, or click the Unlock for Staking Only button.
Go back to the home page and the button should now say Your Wallet Is Unlocked For Staking, Click To Change.
You are all ready to earn staking rewards now.
Backup your wallet
Log into the Web Interface of the NavPi.
Click on the Control menu item.
In the Security section, click the Backup Wallet button.
This will download to your computer.
Make multiple backups to protect against data corruption.
Restoring your wallet
Boot to the Raspberry Pi GUI Operating System.
Open Terminal.
Drag the wallet.dat file from your USB memory stick to the desktop of your navpi.
Type the command sudo mv /home/pi/Desktop/wallet.dat /home/stakebox/.navcoin4/wallet.dat and press enter.
Type in your sudo password or if you haven’t changed it navpi101 and press enter.
Change ownership of the wallet.dat file so the user running the navcoin daemon can access it.
Type the command sudo chown www-data:www-data /home/stakebox/.navcoin4/wallet.dat and press enter.
Type the command sudo chmod 600 /home/stakebox/.navcoin4/wallet.dat and press enter.
Reboot the navpi by typing sudo reboot now and pressing enter
Creating a backup image
Once you’ve done all this setup, it is worth making a backup image of the SD card so if it fails, you can easily restore to this point.
OSX
Create a .dmg of the whole SD Card using disk utility.
Convert the dmg to an img from terminal: hdiutil convert foo.dmg -format UDTO -o bar.img
This .img file can now be burned to a new SD Card using Etcher.
Updating the User Interface
Boot to the Raspberry Pi GUI Operating System.
Open Terminal.
Type cd /home/stakebox/UI and press enter.
Type git pull and press enter.
You will receive any UI updates.
If you have the latest version of the UI, you should be able to perform future updates by using the update button on the control page.
Updating the NavCoin Daemon
If you’re upto date with the latest UI, you can run the following script manually:
/home/stakebox/UI/libs/updater.sh
Or you can add it to your sudo crontab to automatically check for and install new updates
A GET response saved to file. A temporary file is created and the
filename returned. The response will only be saved to file if the
status code is in the 200 range. The directory to download to can
be set using the application env var download_dir – the default
is the current working directory:
Setting the size of the connection pool and pipeline. This sets the
number of maximum connections to the specified server to 10 and the pipeline
size to 1. Connections are assumed to be already setup.
11>ibrowse:set_dest("www.hotmail.com", 80, [{max_sessions, 10},
{max_pipeline_size, 1}]).
ok
62>ibrowse:send_req("http://www.sun.com", [], options).
{ok,"200",
[{"Server","Sun Java System Web Server 6.1"},
{"Date","Mon, 28 Feb 2005 04:44:39 GMT"},
{"Content-Length","0"},
{"P3p",
"policyref=\"http://www.sun.com/p3p/Sun_P3P_Policy.xml\", CP=\"CAO DSP COR CUR ADMa DEVa TAIa PSAa PSDa CONi TELi OUR SAMi PUBi IND PHY ONL PUR COM NAV INT DEM CNT STA POL PRE GOV\""},
{"Set-Cookie",
"SUN_ID=X.X.X.X:169191109565879; EXPIRES=Wednesday, 31-Dec-2025 23:59:59 GMT; DOMAIN=.sun.com; PATH=/"},
{"Allow",
"HEAD, GET, PUT, POST, DELETE, TRACE, OPTIONS, MOVE, INDEX, MKDIR, RMDIR"}],
[]}
Provide utility to create visually appealing and customisable graphic representation of markowitz’s
modern portfolio theory.
Usage
For this you will need two files:
A layout file (see below)
A SQLite database or a list of CSV files, specify the loader with -l flag with historical data,
specify the header you want to load by providing an argument to -c.
You can use this package as a CLI:
>> python -m markowitz --help

usage: PyMarkowitz [options] LAYOUT INPUT [INPUT...]

Display Assets and Portfolio Graphs from Layout Files

positional arguments:
  layout                layout file path
  input                 data input file(s)

optional arguments:
  -h, --help            show this help message and exit
  -l LOADER, --loader LOADER
                        loader (default: sqlite)
  -c COLUMN, --column COLUMN
                        name of the header (default: clot)
  --debug               activate debug mode
  --style STYLE         matplotlib graph style
Or as individual modules:
markowitz/graphs for graph points generators
markowitz/sets for point generators
markowitz/financial for the assets
Layout Files
Syntax:
!	<- comment marker
&	<- start of a new window
(KEY=VALUE)	<- specify options
[]	<- row
|	<- column delimiter
& NAME (OPTIONS) {[|]}  <- valid window
Example:
! Compare the distribution of two assets
& Compare (precision=100, scale=100) {
	[ Kde(asset1) Kde(asset2) ]
	[ NormalGraph(asset1) | NormalGraph(asset2) ]
}
Extending the capabilities
You can extend the available graphs and sets by adding them in the markowitz/graphs and markowitz/sets directories.
Sets are mathematical vector space point iterators. To implement one you need to subclass markowitz/sets/abstract.py which will force you to write a valid point iterator.
Graphs are point iterators that map one set (hence markowitz/sets) to a set of points that
can be graphed. To implement one you need to subclass markowitz/graphs/abstract.py which will
force you to write a points() method which is called when generating the graph, make sure to zip
the coordinates together, eg. zip(x, y). Graphs are loaded dynamically at runtime, use your
implementation by mentioning the class name in the layout file, and name your implementation file
the same way but lowercase. The abstract class holds the default config for a graph, you can
override this config and the config passed when parsing layout files in your implementation.
Loader holds the state of the assets and how they will be loaded, you can implement you own by
following the already existing ones.
To be done
Add better logging
Add unittests
Generate documentation
Split github.io website in two parts: project and documentation
Add package to pypy
Add ability to specify other graph obj directory
Credits
This project is licenced under MIT, see LICENSE.md for more information.
Produced by Léo Duret as part of his annual project following the CMI EFiQuaS curriculum.
uvatradier is a Python package that serves as a wrapper for the Tradier brokerage API. This package simplifies the process of making API requests, handling responses, and performing various trading and account management operations.
The package was originally developed by data science graduate students at the University of Virginia.
Wahoowa.
Features
Account Management: Retrieve profile, balance, gain/loss, orders, and positions related to a trading account.
Trading: Place, modify, and cancel equity and option orders.
Market Data: Access real-time and historical market data for equities and options.
Options Data: Retrieve options chains, strikes, and expiration dates.
Stream Market Events: Stream market events via WebSocket.
To contribute or make changes to the uvatradier package, feel free to create a fork, clone the fork, make some improvements and issue a pull request. From the terminal/command prompt:
At Accept we’re making it faster, easier, and cheaper for people to trade assets, including their goods, skills, and cryptocurrency. Accept.io is a blockchain-powered marketplace built on sharing economy principles where you can trade almost anything freely, safely, and privately, secured by smart contracts and powered by the Fulcrum utility token, Accept’s native settlements token.
This repository contains ERC20 token contract code of Accept.io project.
The FULC is our native settlements token used across our marketplace, and will enable many important functions within the Accept global marketplace including:
A medium of exchange (settlements) for Accept.io buyers and sellers
A consumptive use (utility) token for marketplace users to access premium features in the Accept.io DApp
An incentive for users to help improve the Accept Marketplace and contribute to the long-term development of Accept.io
Accept’s Unique Value Propositions
The Accept.io self-regulating marketplace is primarily powered by:
i) Native dispute resolution processes to protect both buyers and sellers from fraud or dishonest behavior, and
ii) Innovative incentives for user participation in the growth and maintenance of the marketplace.
There are at least six reasons why buyers and sellers will want to join such a marketplace.
1. The Ability to Carry Out Non-monetary Transactions (with no fees)
Thanks to our sophisticated smart contract technology, Accept Marketplace users can freely trade their skills or goods they no longer need in exchange for other goods or services available in the Accept Marketplace. Users can also arrange complex transactions involving any combination of goods and services. As long as no money changes hands, the transaction is completely free.
Accept.io users trade with other users, without intermediaries, while maintaining transaction security. The Accept Marketplace introduces the most basic form of transaction (bartering) to the global online marketplace, with the addition of improved transaction speed and security over traditional payment systems.
2. Faster Settlements With Native Dispute Resolution and Payment Assurance
Today’s top freelancing platforms apply a 5-business-day security hold at the end of every contract. Then it takes 3-5 business days for funds to reach your bank account. In Accept.io, settlements are almost instantaneous.
When both parties agree to end a contract, the funds appear in the service provider’s Fulcrum wallet in seconds. These funds can be used in the Accept Marketplace or transferred to an external cryptocurrency exchange or wallet.
3. A Platform for the Unbanked
Anyone with an internet connection should be able to carry out freelance work or trade online. But many people in developing countries don’t have access to online marketplaces because they don’t have a bank account where they can deposit their earnings. In fact, 20-39% of the world’s population doesn’t have access to a bank account, so there’s a lot of untapped talent.
Anyone with an internet connection can use the Accept Marketplace and get paid in FULC, which can be spent in the marketplace or transferred to a cryptocurrency exchange or wallet.
4. Lower Contract Fees
Popular freelancing platforms like Upwork charge as much as 20% for every contract. This 20% fee invites competition from platforms like Accept.io that can connect hirers and freelancers much more efficiently.
Accept takes a small 2.5% fee from every contract (no matter what size). In addition to the 2.5% fee, buyers and sellers will also have to pay the Ethereum network fee, which is about US$0.50 on average.15
Accept.io will make it easy and cost-effective for anyone, regardless of skill level, to benefit from trading their skills for extra money or things they need.
5. A Decentralized, Self-Regulating Marketplace
Accept.io handles all disputes by incentivizing user participation in the maintenance of our network. All disputes are dealt with by accredited FULC token holders who qualify for our dispute resolution team called the Star Chamber. A Star Council is formed at random (from Star Chamber members) to vote on the resolution of the dispute, and the outcome is decided by majority vote. Star Council participants receive a small fee (paid in FULC) for helping to resolve disputes.
But we’re also working to reduce the frequency of disputes. Blockchain gives developers the power to ‘tokenize’ almost anything. Many of the problems with today’s popular online marketplaces can be solved with the tokenization, or monetization, of reputation.
Trust between freelancers and employers is a constant issue. Too often, employers or freelancers don’t treat each other fairly. This leads to arbitration, which is expensive and time consuming. A cryptocurrency, like Fulcrum, paired with smart contracts can incentivize fair and professional behavior in online marketplaces.
6. Open-Source Technology Development
Accept.io will be developed as a completely open-source platform available through the MIT software license. Users will be able to participate in the growth and management of the network in several ways:
Any user with programming experience can contribute to the further development of Accept.io by taking on challenges created by the Accept.io Leadership Team
Accredited users can help resolve contract disputes by serving in the Star Chamber, our native dispute resolution platform
Entrepreneurial members can start their own Marketplace Node to create a new Accept Marketplace for their local economy
All users receive a unique referral code they can share with friends and acquaintances to unlock rewards
Key Points:
Alpha DApp is deployed to Ropsten. Available on MetaMask app store and at marketplace.accept.io
Partnership agreements in-place with ShapeShift, Bancor, CoinBene, and Sirin Labs
Featured by the media across 28 countries worldwide
Thank you for taking the time to learn more about Accept.io. We appreciate your interest in what we do.
We believe in a future in which the web is a preferred environment for numerical computation. To help realize this future, we’ve built stdlib. stdlib is a standard library, with an emphasis on numerical and scientific computation, written in JavaScript (and C) for execution in browsers and in Node.js.
The library is fully decomposable, being architected in such a way that you can swap out and mix and match APIs and functionality to cater to your exact preferences and use cases.
When you use stdlib, you can be absolutely certain that you are using the most thorough, rigorous, well-written, studied, documented, tested, measured, and high-quality code out there.
To join us in bringing numerical computing to the web, get started by checking us out on GitHub, and please consider financially supporting stdlib. We greatly appreciate your continued support!
Assert
Base double-precision floating-point number assert functions.
Installation
npm install @stdlib/number-float64-base-assert
Alternatively,
To load the package in a website via a script tag without installation and bundlers, use the ES Module available on the esm branch (see README).
If you are using Deno, visit the deno branch (see README for usage intructions).
The branches.md file summarizes the available branches and displays a diagram illustrating their relationships.
To view installation and usage instructions specific to each branch build, be sure to explicitly navigate to the respective README files on each branch, as linked to above.
This package is part of stdlib, a standard library for JavaScript and Node.js, with an emphasis on numerical and scientific computing. The library provides a collection of robust, high performance libraries for mathematics, statistics, streams, utilities, and more.
For more information on the project, filing bug reports and feature requests, and guidance on how to develop stdlib, see the main project repository.


 https://github.com/p4p1/dwmstat


